Get Fluffy Banana Pancakes: Your Go-To Classic Recipe & Expert Tips
There's something uniquely comforting about a stack of warm, golden-brown pancakes, especially when they're studded with sweet, caramelized banana slices. For many, pancakes are more than just a breakfast item; they're a weekend ritual, a special treat, or a delightful way to start any day. If you've been searching for the definitive **banana pancakes recipe** that promises both incredible flavor and an irresistibly fluffy texture, your quest ends here. This comprehensive guide will walk you through crafting the perfect classic banana pancakes, complete with pro tips to elevate your breakfast game and ensure every bite is pure bliss.
We'll delve into the foundational ingredients, the art of mixing, and the secrets to achieving that perfect golden hue. We'll also explore why those often-overlooked overripe bananas are actually your best friend in the kitchen, transforming them from potential waste into a sweet, flavorful masterpiece. So, grab your apron, gather your ingredients, and prepare to make some truly unforgettable banana pancakes.
The Ultimate Classic Banana Pancakes Recipe: A Step-by-Step Guide
This classic **banana pancakes recipe** focuses on a balanced batter that provides both structure and incredible lightness, perfectly complementing the sweetness of fresh bananas. Get ready for a breakfast experience that will have everyone asking for seconds!
Ingredients:
- 1 ½ cups all-purpose flour
- 1 tablespoon granulated sugar
- ½ teaspoon salt
- 1 teaspoon baking soda
- 1 teaspoon baking powder
- 1 large egg
- 1 cup buttermilk
- ¼ cup whole milk
- 1 tablespoon unsalted butter, melted, plus 3 tablespoons for cooking
- 3 ripe bananas, cut into ⅓-inch slices
- Optional: Maple syrup, whipped cream, extra banana slices, or berries for serving
Instructions:
- Preheat Your Oven: Start by preheating your oven to a low 200°F (95°C). This often-skipped step is crucial for keeping your cooked pancakes warm while you finish the rest of the batch, ensuring everyone enjoys hot, fresh pancakes.
- Combine Dry Ingredients: In a large mixing bowl, sift together the all-purpose flour, granulated sugar, salt, baking soda, and baking powder. Sifting helps to aerate the flour and ensures all leavening agents and flavorings are evenly distributed, leading to a consistently light and fluffy pancake. Use a whisk to gently combine everything.
- Whisk Wet Ingredients: In a separate medium bowl, whisk together the large egg, buttermilk, whole milk, and the 1 tablespoon of melted unsalted butter. Ensure the melted butter isn't too hot, as it could scramble the egg. The combination of buttermilk and whole milk contributes significantly to the pancakes' tender texture and subtle tang.
- Gently Combine Wet and Dry: Create a well in the center of your dry ingredients. Pour the wet mixture into the well. Using a spoon or spatula, *slowly* combine the dry ingredients with the wet, stirring just until the flour disappears. It's perfectly normal, and even desirable, for the batter to still have small lumps. Overmixing develops the gluten in the flour, resulting in tough, rubbery pancakes rather than the desired light and airy ones.
- Prepare Your Skillet: Heat a large cast-iron skillet or a non-stick griddle over medium heat. Add about ½ tablespoon of the remaining unsalted butter to the hot pan. Swirl to coat the bottom evenly. You'll want to add more butter between batches as needed to prevent sticking and aid in browning.
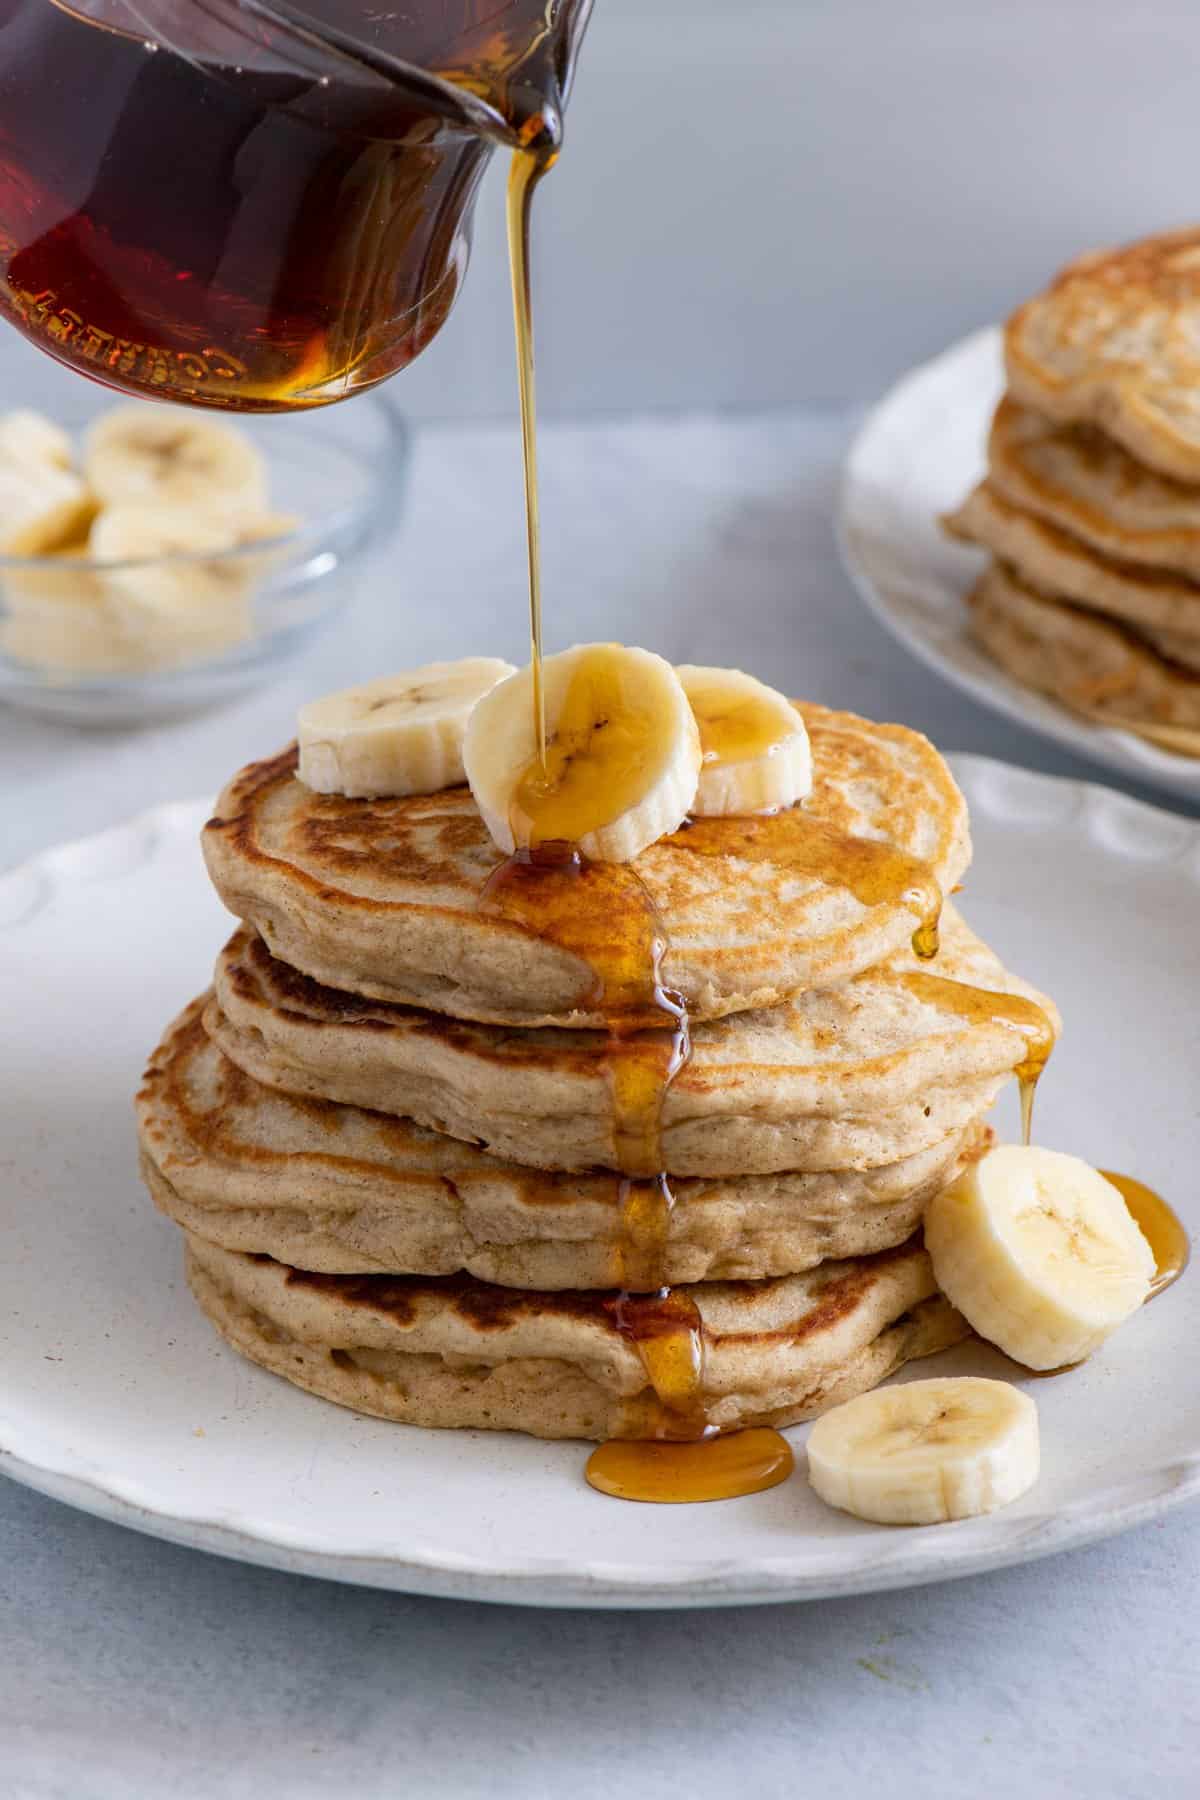
- Cook the Pancakes: Ladle approximately ¼ cup of batter into the pan for each pancake, leaving enough space between them for easy flipping. Immediately, while the batter is still wet, press 4 or 5 banana slices into each pancake. The batter should slightly ooze over the fruit, securing it in place.
- Flip and Finish: Cook the pancakes for about 2-3 minutes on the first side, or until you see small bubbles appearing on the surface and the edges look set. The underside should be golden brown. Gently slide your spatula under each pancake and flip. Cook for another 1-2 minutes on the second side, until golden brown and cooked through. The total cooking time for each pancake should be around 3 minutes.
- Keep Warm and Serve: Transfer the cooked pancakes to a platter and place them in your preheated oven to keep warm while you cook the remaining batches. Continue the process, adding more butter to the pan as needed, until all the batter is used. Serve your hot, fluffy banana pancakes immediately with your favorite toppings, such as maple syrup, a dollop of whipped cream, or extra fresh fruit.
Why Overripe Bananas are Your Secret Weapon
When it comes to making the best banana pancakes, the ripeness of your bananas isn't just a suggestion – it's a game-changer. Those spotty, brown-speckled bananas that might seem past their prime are actually culinary gold. Here’s why:
*
Intensified Sweetness: As bananas ripen, their starches convert into natural sugars. This means overripe bananas are significantly sweeter than their firmer, yellow counterparts, providing a natural burst of sweetness to your pancakes without needing to add excessive extra sugar. This is especially true for simplified recipes, such as
The Ultimate 3-Ingredient Banana Pancake Recipe for Overripe Fruit, where the banana's sweetness is paramount.
*
Enhanced Banana Flavor: The ripening process also concentrates the banana's characteristic aroma and flavor. Using overripe bananas ensures that delightful, fruity essence shines through in every bite of your pancakes.
*
Perfect Texture for Mashing: Overripe bananas are soft and easy to mash or slice. While our classic recipe uses slices, if you were to mash them into the batter for a banana-infused pancake, their soft texture makes the job effortless, creating a smooth, incorporated flavor throughout.
*
Less Food Waste: Perhaps one of the most practical reasons is sustainability. Instead of letting those neglected bananas go to waste, transforming them into a delicious breakfast is a win-win for your taste buds and the planet.
So, next time you see bananas turning a little too brown on your counter, don't despair – celebrate! You're just a step closer to some of the most flavorful banana pancakes you've ever tasted.
Pro Tips for Perfectly Fluffy Banana Pancakes Every Time
Achieving that ideal fluffy texture and golden-brown perfection takes a little know-how. Here are some expert tips to ensure your banana pancakes are always a success:
*
Do Not Overmix the Batter: This is arguably the most crucial tip for fluffy pancakes. Stirring too much develops the gluten in the flour, leading to tough, chewy pancakes. A few lumps are perfectly fine and even desired; they indicate you haven't overmixed. The magic of the baking powder and baking soda needs that gentle touch to create air pockets.
*
The Importance of Buttermilk: Buttermilk reacts with the baking soda to create carbon dioxide bubbles, contributing to the pancakes' lift and tender crumb. If you don't have buttermilk on hand, you can make a simple substitute: add 1 tablespoon of white vinegar or lemon juice to a liquid measuring cup, then fill the rest of the way to 1 cup with whole milk. Let it sit for 5-10 minutes until it slightly curdles.
*
Correct Pan Temperature: Medium heat is your friend. If the pan is too hot, the pancakes will burn on the outside before cooking through, and the sugar from the bananas will caramelize too quickly. If it's too cool, they'll turn out pale and greasy. A good test is to flick a few drops of water onto the hot pan; if they sizzle and evaporate within a couple of seconds, it’s ready.
*
The First Pancake Rule: Don't get discouraged if your first pancake isn't perfect. It's often a test run for your pan's temperature and the batter's consistency. Adjust the heat as needed and proceed with confidence for the rest of the batch.
*
Adding Bananas: For this classic recipe, pressing the banana slices *into* the batter after it's in the pan ensures the fruit stays intact and creates beautiful caramelized edges on the finished pancake. If you were to mix them directly into the batter, they might sink, or the batter could become too thick and watery from the fruit's moisture.
*
The Bubble Test for Flipping: While some recipes, particularly those with fewer ingredients, might require a spatula check for doneness, for classic pancakes with leavening agents, look for visible bubbles breaking on the surface and edges that appear dry and set. This is your cue to flip.
*
Keeping Pancakes Warm: The oven trick is a lifesaver, especially when feeding a crowd. It allows you to cook all your pancakes at a relaxed pace without sacrificing warmth. Place them in a single layer on a baking sheet to prevent steaming.
*
Don't Be Shy with Toppings: While maple syrup is a classic for a reason, consider elevating your banana pancakes with a sprinkle of cinnamon, a dusting of powdered sugar, a dollop of Greek yogurt, or a handful of fresh berries. A touch of whipped cream never hurts either!
Classic vs. 3-Ingredient: Which Banana Pancake Recipe is Right for You?
You might have heard of ultra-simple 3-ingredient banana pancake recipes. These often feature just banana, egg, and a bit of flour, serving as a quick, healthy alternative, especially great for using up those overripe bananas without much fuss. However, the classic **banana pancakes recipe** we’ve outlined above offers a different, more traditional pancake experience.
*
The Classic Approach: This recipe uses leavening agents (baking powder and baking soda), buttermilk, and a careful balance of wet and dry ingredients. The result is a genuinely fluffy, airy pancake with a satisfying texture that holds up well to toppings. The structure is robust, and the flavor is rich, thanks to the layered ingredients. It's the ultimate comfort food and a fantastic weekend project.
*
The 3-Ingredient Alternative: By contrast,
Two Ways to Delicious: Classic vs. 3-Ingredient Banana Pancakes highlights how the simpler version is quicker, often healthier (less sugar, sometimes gluten-free options), and relies almost entirely on the banana for sweetness and some of the structure. These pancakes are often denser, less traditionally "fluffy," and can brown more irregularly due to the high sugar content from the banana. They’re excellent for quick weeknight breakfasts or when you’re out of conventional pancake ingredients.
Ultimately, the choice depends on your time, dietary preferences, and what kind of pancake experience you're craving. Both methods are delicious ways to enjoy the magic of bananas in pancake form!
Conclusion
Mastering the classic **banana pancakes recipe** is a rewarding culinary achievement that brings joy to any breakfast or brunch table. By following these detailed instructions and incorporating our expert tips, you're not just making pancakes; you're crafting a memorable experience. From understanding the crucial role of overripe bananas to perfecting your batter consistency and pan temperature, every step contributes to that delightful stack of fluffy, golden-brown goodness. So go ahead, embrace the simple pleasure of homemade banana pancakes, and savor every sweet, banana-infused bite. Happy flipping!